Cleaned and Dried, Ready-to-Craft Gourds For Sale
Growing Gourds in Colder Locations
If you plan to do craft projects with gourds, you can buy dried gourds, or you can grow them yourself. Here is a look at the gourd growing process, with a special emphasis on growing in colder locations. The process is generally the same as in warmer climates, but with some modifications.
Starting the Gourd Plants from Seeds
Gourds need a long growing season, so in our area that means starting the plants indoors. I start the larger gourds early in April. Gourd seeds have a hard outer shell so a 24 hr. soak and a little chip or file of the seed coat speeds up germination.
After soaking, wrap seeds in moist paper towels and place in a plastic bag. You could also put seeds in jiffy pots or homemade paper pots. Heat really helps germination so place them in a very warm location. I have a seed starting mat I use but have found I prefer the large water tank on our coal furnace we use for heating the house.
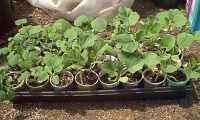
When you see sprouts you can move them into larger containers.
I use milk cartons I've been saving so they have lots of room for root growth. When the time for planting finally gets here I can rip the cartons off and not disturb the roots.
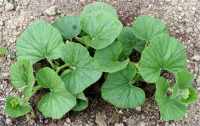
The gourd plants will need plenty of light after sprouting. I have an unheated greenhouse that by the middle of April usually stays warm enough for the gourds. If it does get extra cold, I cover them with my row covers. You could make a small cold frame, place where it gets plenty of sun, and set you gourd plants in it. Be sure to lift it during sunny weather to vent it.
Planting the Gourds Outside
By late May or early June, it's finally warm enough to put the plants into the ground outside. Enrich your soil with plenty of compost or other organic soil conditioners. General instructions say to plant 10' apart but I find my gourds never need that much room so I plant around 4' apart. I'm sure in warmer climates you get more vine growth and have to worry about them climbing all over each other. Also, if you grow on a trellis, they could be planted closer.
Gourds are heavy feeders and I start out with a high nitrogen fertilizer to give plants a good start. Later on when the gourds start to form, cut back on the nitrogen and use fertilizer higher in phosphorus. Plenty of water is needed and if Mother Nature doesn't supply us with enough, be sure to water well.
Cucumber beetles usually find the plants the minute you set them out. They seem to bother the ornamental gourds the most. I use an oil spray to help keep them in check. Later on the squash bugs come to visit. If you get at them early the oil spray will work on them, too.
For people who don't mind using chemicals, Sevin is the preferred pesticide. One thing you might want to try is taking some of the insides of a gourd and putting the Sevin on that. It is supposed to attract the insects and then they will be eliminated that way. I haven't tried it yet but am thinking about it.
The gourd plant will send out one long vine and then laterals form on that. It is on these laterals that the gourds form. To encourage more laterals, pinch the end of the main vine at about 5'. In warmer climates, growers usually wait for the vine to grow 10' but I do it a little earlier since our season is short.
Pollinating the Gourd Flowers
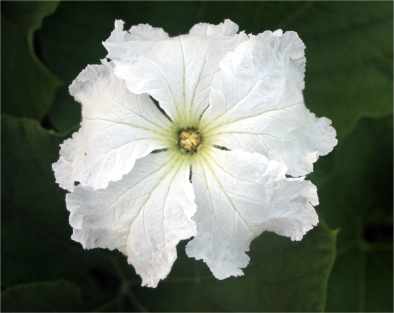
Watch now for the female flowers. The male flowers should have already started. You can tell the females by the miniature gourds under the flowers. Hard-shell gourd flowers are white and open at night and so are pollinated by nighttime insects. To be sure I get good pollination I do a little pollinating myself. Find a male flower and remove it from the vine. Place it over the female flower and tap. The pollen should fall onto the female. You can also take a small, soft paint brush and remove pollen from the male and brush on the female.
|
|
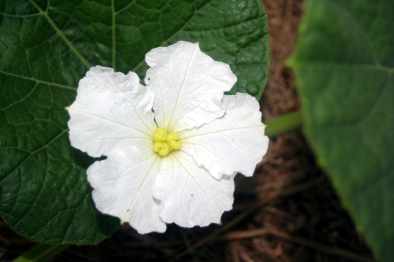
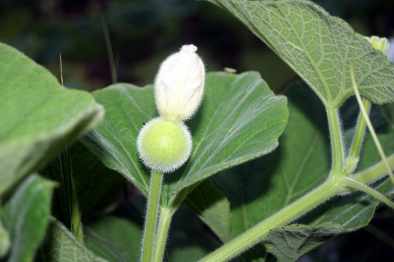
This is the side view of a female gourd flower. If you are not sure by looking from the top, check to see it there is a baby gourd below the flower. This flower hasn't opened yet but when it does it will only last the one night. If it isn't pollinated successfully the gourd will wither and drop off.
Gourds cross pollinate easily, so if you plan to save seeds and want true strains, you must bag the pollinated gourd until the flower is finished. Be sure to tag the gourd so you can find the right one. I like surprises when I grow gourds so I let them mix.
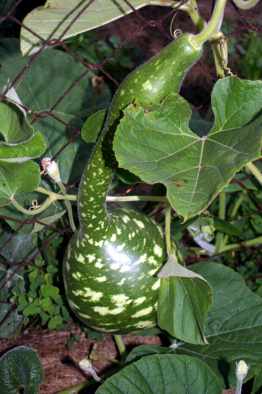
Gourds can be grown on a trellis to cut down on space. I don't recommend the larger types of gourds for on a trellis. There is a chance they will break off the vine if they grow very large and don't have the ground supporting them. If you do get a heavy one on a trellis, support it using panty hose or any other means you can think of.
As the gourds grow, I set them upright being careful not to break or bend any stems. This lets them grow more uniformly with a flat bottom. Certain gourds I like to leave to their own growing habits. Like dippers or swans that you want a curvy neck on.
Any gourds that form after August 30, I remove. They aren't going to make it, and you will be better off sending all energy to the gourds that are.
Harvesting and Drying the Gourds
Don't harvest anything until the gourd plants are totally dead. Even if the leaves are frosted, the vines will still carry nutrients to the gourds. It is usually late November before I remove gourds from the field.
You can leave the gourds in the field all winter long, but I worry about the destructive critters like deer and rabbits. Cut the gourd from the vine leaving a good portion of vine attached. They will be very heavy at this time since they are full of water.
They should be dried either hanging or placed on a rack off the ground, outside or in an unheated shed. Gourds dried outside are easier to clean and get less molding. Any gourds that you plan on saving seeds from should be kept from freezing until they are dry. I've heard some people say this isn't something to worry about, but I would rather be safe than sorry.

It will take several months, even close to a year, for the gourds to dry. You can speed up the process by "green scraping" them. After they have sat outside for a few weeks, you will notice the top layer of skin begin to loosen. Take the dull side of a butter knife and carefully scrape this skin off. This helps them dry out quicker and they will require less cleaning when dry. If you do this, place them in a shaded location. Speed drying can cause some cracking of shells.
Don't dry your gourds in the house. The molding process can cause allergic reactions.
Don't throw your gourds out if they begin to mold. This is a normal process.
If your gourds have grown to maturity they will dry with a good sturdy shell. An immature gourd will go soft and rot no matter how you dry it.
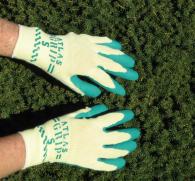
These are my favorite gloves for gardening and I would never be without them. You can find out more about them by just clicking on the picture.
Here are links to other folks ways of growing:
Growing Tips from North Carolina Gourd Society
Growing Gourds